Craft Your Style: Create Custom Patches for a Unique Look
Custom patches are embroidered or woven designs that can be attached to clothing, accessories, or other items. They are a form of personalization and self-expression, allowing individuals or groups to showcase their unique style and identity. Patches have a long history, dating back to ancient civilizations where they were used for military purposes. Over time, patches have evolved to become a popular fashion statement and a way to represent various subcultures and organizations.
Patches have played a significant role in fashion and culture. They have been used by military personnel to denote rank and achievements, by motorcycle clubs to display their affiliation, and by punk rockers to express their rebellious spirit. In recent years, patches have gained popularity in mainstream fashion, with designers incorporating them into their collections. Custom patches allow individuals to stand out from the crowd and make a statement about who they are and what they believe in.
Key Takeaways
- Custom patches are a great way to add a personal touch to clothing and accessories.
- Benefits of custom patches include branding, identification, and personal expression.
- When choosing a patch design, consider the size, shape, and color scheme.
- Materials and tools needed for patch making include fabric, thread, needles, and a sewing machine.
- Follow a step-by-step guide to create your own custom patches and add personal touches to make them stand out.
The Benefits of Custom Patches: Why You Should Consider Them
One of the main benefits of custom patches is the ability to personalize and create something unique. With custom patches, you can design something that reflects your personality, interests, or beliefs. Whether you want to showcase your love for a particular band, support a cause, or simply add a touch of individuality to your clothing, custom patches allow you to do so.
Custom patches also offer branding and marketing opportunities. Businesses can create patches with their logo or slogan to promote their brand and increase brand recognition. Patches can be attached to employee uniforms, given away as promotional items, or sold as merchandise. They serve as a walking advertisement for the business and can help create a sense of unity among employees.
In addition to personalization and branding, custom patches also provide group identification and unity. They can be used by sports teams, clubs, or organizations to create a sense of belonging and camaraderie among members. Wearing a patch that represents a group or cause can foster a sense of pride and solidarity.
Another advantage of custom patches is their cost-effectiveness. Compared to other forms of customization, such as screen printing or embroidery directly onto clothing, patches are relatively inexpensive. They can be easily attached and removed from different items, allowing for versatility and flexibility. This makes them a cost-effective option for businesses, organizations, or individuals who want to add a personalized touch without breaking the bank.
Choosing the Right Patch Design: Tips and Tricks
When designing custom patches, there are several factors to consider to ensure that the final product meets your expectations. Here are some tips and tricks to help you choose the right patch design:
1. Consider the purpose and audience: Think about why you want to create custom patches and who will be wearing them. Are they for personal use, promotional purposes, or as part of a uniform? Understanding the purpose and audience will help you determine the appropriate design elements, colors, and size.
2. Research and gather inspiration: Look for inspiration from various sources such as fashion magazines, online platforms, or even nature. Take note of designs that catch your eye and consider how they can be adapted to your patch design. Gathering inspiration will help you create a unique and visually appealing design.
3. Work with a professional designer or create your own design: If you have a specific vision in mind but lack the design skills, consider working with a professional designer who can bring your ideas to life. Alternatively, if you have some design skills, you can create your own design using graphic design software or online tools.
4. Test the design before production: Before committing to the final design, it’s essential to test it on a small scale. Print out a sample of the design and attach it to fabric or clothing to see how it looks in real life. This will give you an idea of how the colors, size, and placement will appear on the finished patch.
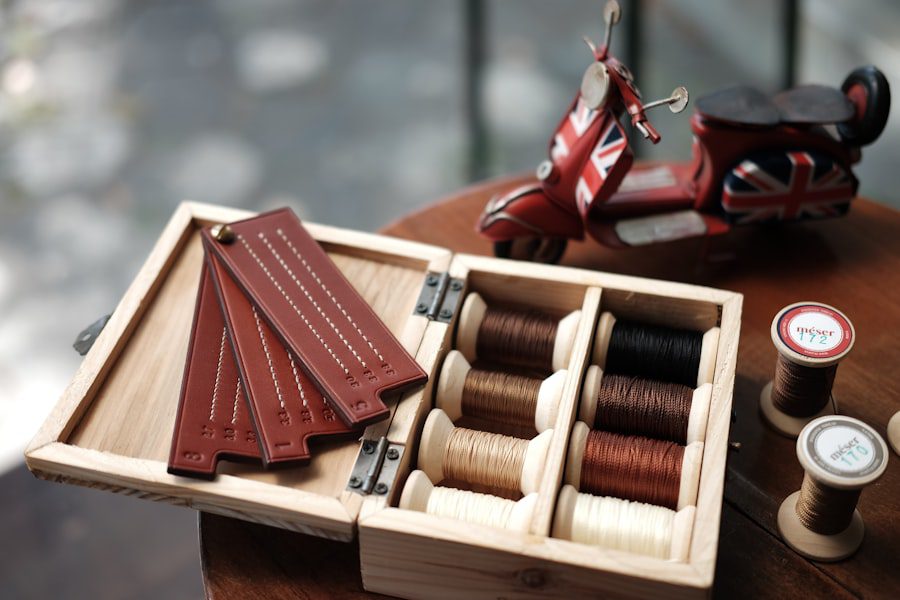
Materials and Tools Needed for Patch Making: A Comprehensive Guide
| Materials | Tools |
|---|---|
| Patch fabric | Scissors |
| Thread | Sewing machine or needle |
| Iron-on adhesive | Iron |
| Fusible interfacing | Measuring tape |
| Fabric marker | Straight pins |
| Seam ripper | Thimble |
To create custom patches, you will need various materials and tools. Here is a comprehensive guide to help you get started:
1. Fabric options: Choose a fabric that is suitable for your patch design and intended use. Common options include cotton, polyester, or twill. Consider the weight, color, and texture of the fabric to ensure it complements your design.
2. Thread types and colors: Select the appropriate thread type and color for your patch design. Polyester or rayon threads are commonly used for embroidery. Consider using contrasting colors to make your design stand out or match the thread color to the fabric for a more subtle look.
3. Embroidery machines and software: If you plan on creating embroidered patches, you will need an embroidery machine. There are various options available, ranging from basic models for beginners to more advanced machines for professionals. Additionally, you will need embroidery software to digitize your design and control the machine.
4. Other necessary tools and equipment: In addition to an embroidery machine, you will need other tools such as embroidery hoops, needles, scissors, stabilizers, and marking tools. These tools will help you create clean and precise patches.
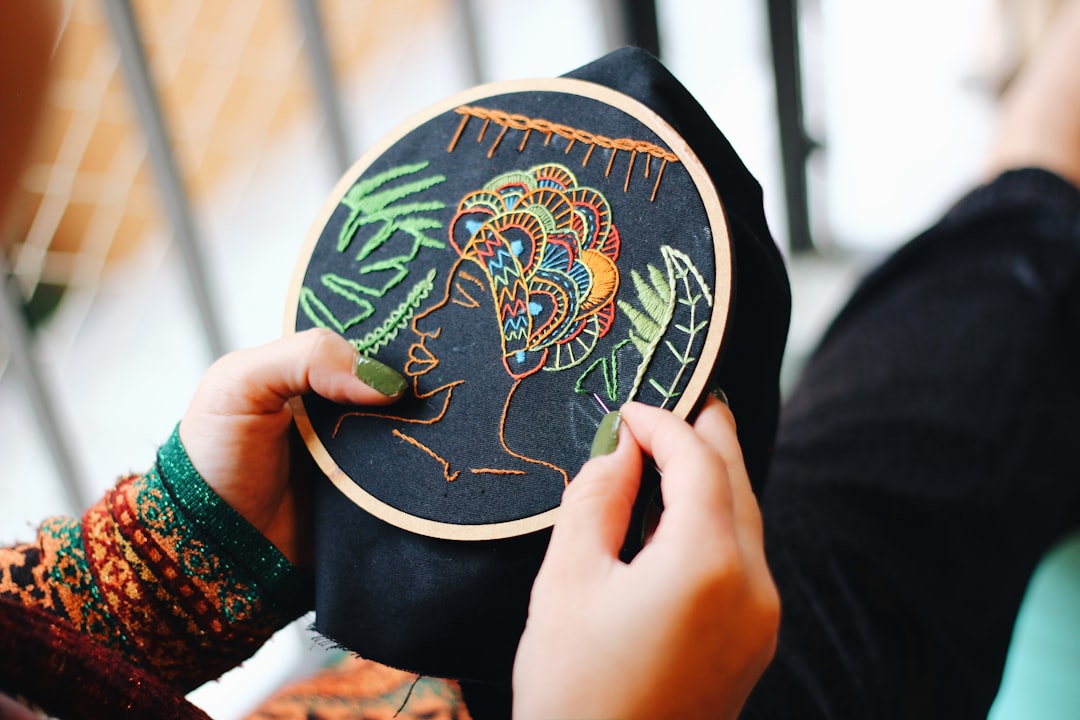
Step-by-Step Guide to Creating Your Own Custom Patches
Now that you have gathered your materials and tools, here is a step-by-step guide to creating your own custom patches:
1. Preparing the design and materials: Start by digitizing your design using embroidery software. Adjust the size, colors, and stitch types as needed. Once you are satisfied with the design, transfer it to your embroidery machine. Prepare your fabric by cutting it into the desired shape and size for your patch.
2. Setting up the embroidery machine: Attach the fabric to an embroidery hoop or frame to keep it taut during stitching. Load the design onto your embroidery machine and thread it with the appropriate color thread. Make sure the tension is set correctly to avoid any issues during stitching.
3. Embroidering the patch: Start the embroidery machine and let it stitch out your design. Monitor the process to ensure that the stitches are forming correctly and that the thread tension is consistent. Once the design is complete, remove the fabric from the hoop or frame.
4. Finishing touches and trimming: Trim any excess fabric or threads from the patch. You can also add a backing material such as heat-seal adhesive or Velcro to make it easier to attach the patch to clothing or accessories.
Adding Personal Touches: How to Make Your Patches Stand Out
To make your custom patches stand out, consider adding personal touches and unique elements. Here are some ideas to help you make your patches more visually appealing:
1. Experiment with different fabrics and thread colors: Instead of using traditional cotton or polyester fabrics, consider using unique materials such as denim, leather, or velvet. Similarly, try using contrasting thread colors or metallic threads to add visual interest to your design.
2. Incorporate unique shapes and sizes: Instead of sticking to traditional square or rectangular patches, experiment with different shapes such as circles, triangles, or even custom shapes that reflect your design. Varying the size of your patches can also create visual interest and allow for more versatility in their use.
3. Add embellishments such as sequins or beads: For a more eye-catching design, consider adding embellishments such as sequins, beads, or rhinestones. These can be hand-sewn onto the patch after embroidery or incorporated into the design during digitization.
4. Consider alternative patch styles such as PVC or woven patches: While embroidered patches are the most common type, there are other options available such as PVC patches or woven patches. PVC patches are made from a flexible rubber-like material and are durable and waterproof. Woven patches are made using a weaving process and offer a more detailed and intricate design.
Different Types of Custom Patches: Which One is Right for You?
When it comes to custom patches, there are various types to choose from. Here are some of the most common types and their characteristics:
1. Embroidered patches: Embroidered patches are made by stitching thread onto fabric. They offer a textured and three-dimensional look and can be highly detailed. They are versatile and can be attached to various items such as clothing, bags, or hats.
2. PVC patches: PVC patches are made from a flexible rubber-like material called polyvinyl chloride (PVC). They are durable, waterproof, and resistant to fading or fraying. PVC patches are commonly used for outdoor gear, military uniforms, or items that require durability.
3. Woven patches: Woven patches are made using a weaving process instead of embroidery. They offer a more detailed and intricate design compared to embroidered patches. Woven patches have a smooth surface and can be used for fine details or small text.
4. Leather patches: Leather patches are made from genuine or synthetic leather. They offer a classic and sophisticated look and can be embossed or debossed with designs or logos. Leather patches are commonly used for high-end clothing, accessories, or promotional items.
5. Sublimated patches: Sublimated patches are created using a heat transfer process that infuses the design into the fabric. This allows for full-color designs with intricate details. Sublimated patches are commonly used for sports uniforms, team logos, or promotional items.
Creative Uses for Custom Patches: Beyond Just Clothing
While custom patches are commonly associated with clothing, they can be used in various other ways to add a personal touch or promote your brand. Here are some creative uses for custom patches:
1. Accessories such as hats and bags: Attach custom patches to hats, caps, or beanies to add a unique touch. Patches can also be sewn or ironed onto bags, backpacks, or purses to personalize them.
2. Home decor such as pillows and wall hangings: Create custom patches to decorate your home. Attach them to pillows, cushions, or blankets for a personalized touch. Patches can also be framed or hung on the wall as unique art pieces.
3. Promotional items such as keychains and magnets: Custom patches can be turned into promotional items such as keychains, magnets, or pins. These can be given away at events or used as merchandise to promote your brand or organization.
4. DIY projects such as patchwork quilts: Collect various custom patches and create a patchwork quilt or blanket. This is a great way to showcase your collection and create a unique and meaningful keepsake.
Caring for Your Custom Patches: Maintenance and Preservation
To ensure that your custom patches last for a long time and maintain their appearance, it’s important to properly care for them. Here are some tips for maintaining and preserving your patches:
1. Proper washing and drying techniques: Follow the care instructions provided with your clothing or accessory when washing and drying items with attached patches. If the item is machine washable, turn it inside out before washing to protect the patch. Use a gentle cycle and cold water to minimize color fading or bleeding. Avoid using bleach or harsh detergents that can damage the patch.
2. Storage and display options: When not in use, store your patches in a cool, dry place away from direct sunlight. Avoid folding or creasing the patches as this can damage the embroidery or design. If you want to display your patches, consider framing them or using a shadow box to protect them from dust and damage.
3. Repairing damaged patches: If a patch becomes loose or starts to fray, it’s important to repair it as soon as possible. Use a needle and thread to secure any loose threads or reattach the patch if necessary. If the patch is severely damaged, consider contacting a professional patch repair service.
Embrace Your Unique Style with Custom Patches
In conclusion, custom patches offer a wide range of benefits and opportunities for personalization and self-expression. Whether you want to showcase your individuality, promote your brand, or create a sense of unity among a group, custom patches are a versatile and cost-effective option. By following the tips and tricks outlined in this article, you can create your own unique designs and bring them to life through embroidery or other patch-making techniques. So why wait? Embrace your unique style and start creating your own custom patches today!
Looking to create custom patches for your organization or team? Check out this informative article on CustomEmbroideredBadges.com that provides a comprehensive guide on how to design and order embroidery patches. Whether you need custom patches for uniforms, promotional items, or personal use, this article covers everything from choosing the right patch type to selecting the perfect design. Don’t miss out on this valuable resource! Click here to read the article and get started on creating your own unique patches.
FAQs
What are custom patches?
Custom patches are embroidered or woven designs that are created to represent a specific group, organization, or individual. They can be used for a variety of purposes, including branding, identification, and decoration.
How are custom patches made?
Custom patches can be made using a variety of methods, including embroidery, weaving, and printing. The design is typically created using specialized software and then transferred onto the patch material using a machine or other equipment.
What materials are used to make custom patches?
Custom patches can be made from a variety of materials, including cotton, polyester, nylon, and twill. The backing material can also vary, with options including iron-on, adhesive, and Velcro.
What are the benefits of using custom patches?
Custom patches can provide a number of benefits, including increased brand recognition, improved team or group identification, and enhanced visual appeal. They can also be used to commemorate special events or achievements.
How can I order custom patches?
There are a number of companies that specialize in creating custom patches. To order, you will typically need to provide a design or logo, choose the patch size and material, and specify any additional features such as backing or edging. The company will then create a sample for your approval before producing the final product.